Showing posts with label Flowers. Show all posts

Thursday, 25 August 2016

Things on Sticks..

....Flowers to be exact..the stamp is from Woodware.It's stamped onto patterned paper..no need to colour!


The leaf is from an old Hero Arts set.


 They're cut out and then stuck onto sticks.. the kind you stir your coffee with!

Tuesday, 4 March 2014

A Few...

.. Cards..I'm absolutely bereft of inspiration at the moment so I've just been clagging stuff on pieces of card and shuffling paper around..


I think I need to get back to my inky grungy roots..


and put away the cute glittery stuff.


Or maybe find a happy medium..


I have the same problem with dressing myself..a contant battle of styles.. one minute its boho stuff the next its preppy stuff.. although at the moment it's if it fits wear it!.. she says... stuffing herself with popcorn!

Thursday, 27 February 2014

Flower Power...

...make your own!...with these stamens, diamante or pearl centers from 3djean and a few punches...
Punch out the flowers, clip to almost the center and use a round ended pen to add a little dimension to the petals.


Layer up the shapes and add the stamens and the centers. I used the stamens as antenna on the butterflies

Pretty!


I think I may add a little more bling to the bunny.. maybe a necklace.


and an eye!

Tuesday, 4 February 2014

I Just Had....

to have a go at making these... such a simple idea but so effective.. there's a lot of creative cleaver people out there.....and I came across Valita......I copied...  you can see what she's done here.. These hydrangeas are made with a heart punch from Stampin'Up.


and finished with some pearly centers .. you can get them here.


Friday, 10 May 2013

Peony or Anenome?

...either way difficult to spell but easy to make...


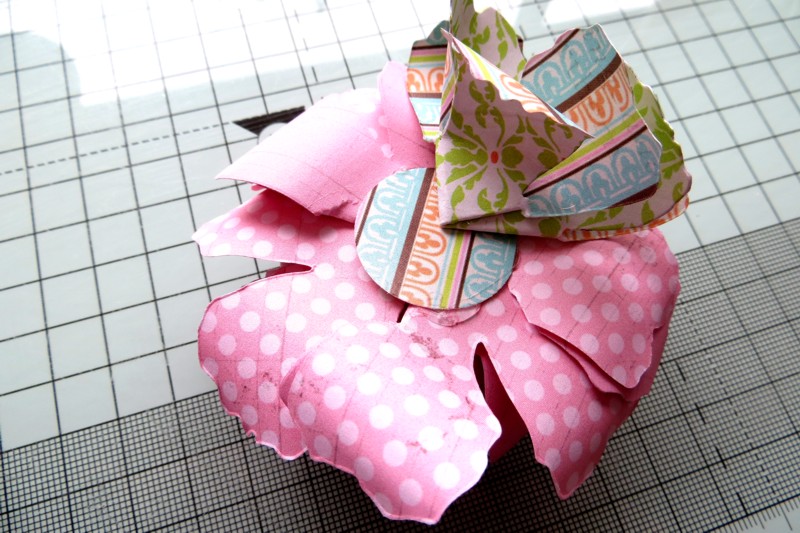
I used the Tim Holtz tattered Flowers die and this double sided patterned paper...from 3djean...and at  70p a sheet it won't break the bank.Cut 4 in the large flower for the top, 4 smaller flowers for the centre and 4 large flowers for the lower layer in a contrast patterned paper


Fold each flower in half and then quarters... use a hot glue gun to glue together, this is quicker than using wet glue (if you use wet glue use a peg to hold until dry).


You may have to tear some petals to make them lie flat...Curl your petals

 
Punch a circle... glue one set of four flowers to the circle. Glue the smaller flowers inside this set of four.Turn the flower upside down and glue the contrast flowers to the circle..the petals should curl in the opposite direction.


Make a hole in the centre... push a piece of florists wire through, bend the end.

 
Secure with hot glue and add a flat back gem..

 
Peony or anenome.... you decide.

Wednesday, 30 January 2013

EfemeraInk

.. met on Monday, we decorated canvases, instead of paper, stamps and Mod Podge we used fabrics..this is a brief description of how we did it.... first cover the canvas with a layer of thin lace or tulle, use PVA glue, then add patches of thick lace, glue down..cover everything with gesso..

add extra depth and texture with chipboard shapes.. glue down and gesso.. I used the same brush all the time, next time I think I will make up a mixture of equal parts gesso and glue.

The aim was to get everyhing 'melded' together and create a textured surface.Colour was added with spray inks.. sprayed on and wiped off and extra bits added with a paintbrush. Extra embellishments added when everything was dry. Add the focal point.. I used a Tim Holtz doll... with a crown of course.

I love this bling stuff.. you can get it here..

This one is a work in progress... I wanted a little more colour this time..the flowers were gessoed and inked, layered and stamens stuck in the middle.


Sunday, 20 January 2013

All made With Ribbon...

It's time for January Ribbon Girl colour challenge, this months colours are ivory and pink. These flowers are easy to make and depending on the ribbon you use can look so very different. The middles are just layered up buttons and pearl beads.


To make the flowers  take a length of ribbon ...around 35cm is a good length to start with.. the longer the ribbon the more petals you will have. Stitch along the length of the ribbon diagonally, the spaces between the the peaks are roughly 4-5 cm, use a fairly long stitch. 
Carefully pull up one of the threads to gather the ribbon, do this quite tightly and evenly.Use the thread to stitch the bottom of each petal together, this will pull the flower together, securely fasten off the thread, tuck the ends of the ribbon  behind the flower and secure with a few stitches. 
To make the stamens for the ivory flower simply tie knots at intervals in some seam binding, snip next to the knot as closely as possible....stitch to the centre of the flower before adding your buttons.

Friday, 17 February 2012

Magpie....

...that's me when it comes to brightly coloured objects.....I can't resist collecting these vintage knitting needles. (I can knit but it's far too slow a process for me so I don't) I just love the look of these and they live in a large jam jar on a shelf where I can see them everyday....


The old plastic wool cones are pretty too, the ones above are around 8" tall but the white one below is about 12"... I've stitched it with vinyl flowers cut with the Big Shot and buttons...it's meant to have a night light in the middle (battery powered) but it seems I've never gotten around to that bit... One day!


What do you collect, I'd love to know...

Monday, 23 August 2010

Wreaths galore!

Today was Efemera Ink's monthly meeting.......... this is what we did..
This is mine... made for a friend who loves Bingo!

Effie.
who likes odd stuff


Sheila.
who loves all things pinky purpley

Who likes all things Goth


Liz
who loves all things flowery


Mabel
Who makes things under duress!

Julie
Who creates gorgeous stuff


Fiona
who likes pretty stuff

Sylvia
Who usually makes all things turquoise!
A great day was had by all!

Thursday, 19 August 2010

Spooky!

What can you do with a polystyrene ring a bit of crepe paper and some Sizzix dies that have sat on a shelf forever ( They seemed a great purchase at the time!)...........

Make a wreath, I can never get these rings covered so they look nice... so this time I've just painted it with acrylic paint... bright green!

I cut lots of rageddy flowers with Flower Layers No2 die.. crepe paper is ideal for this as it's nice and floppy... and cheap! They were pinned on with a punched flower in black flocked card (Doodlebug I think)and a flower shaped sequin.
(Sounds scarily like you know what!)
The Phrase "Sweet with Skull" die was cut and pinned in place. Bats cut with the BatsNo3 die were covered in black glass glitter and glued onto florists wire and poked into the ring


an alternative is Pumpkin Toy....
or House, Spooky


All papers are Basic Grey Eerie..
This is the project for the monthly Efemera Ink group which meets next Monday...... I'm cutting it a bit fine with the samples...there's a Home Sweet Home one to make yet!

Wednesday, 18 August 2010

On Your Bike!

Still got the sewing head on........... but I couldn't resist this fabric from Pink Chalk Fabrics, the colours are fab and the bikes are just too cute! I altered (now there's a shock!) the length of the handle because I like a bag that will go over the shoulder.

I wasn't too keen on the eyelet pockets........... until...........

I came up with the idea of making little felt dangles....... the felt just seemed to go with the linen fabric!

........ Of course I didn't just buy the bicycles......... I bought the glasses in green and the helicopters in grey!.......... projects number 647!