Showing posts with label Ribbon Girl. Show all posts

Monday, 17 November 2014

Just Hanging....

... Around...It's November's colour challenge over on the Ribbon Girl blog..This month the colour is red..
I know... I've used a lot of blue too but that just sets off the red!


There's some fab little wooden shapes in shop, hearts, stars, labels and reindeer too.
I covered them in patterned paper..


Added some rusty bells, Merry Christmas ribbon..(out of stock at the moment but keep checking)


Gingham ribbon.. and all tied together with button twine onto a length of garden twine..
I was going to add bling to the garland but sometimes less is more.
If you would like the chance to win some ribbony goodness and a great prize from Marianne Designs then hop on over here to add your red project.
Sadly this will be my last post for the Ribbon Girl, it's time to step aside and take a break.

Sunday, 20 July 2014

Oops!

... I nearly forgot... well not so much as forgot but thought I had another week to go!... One day I must get myself organised..
This months colour for The Ribbon  Girl colour challenge is Aqua, one of my favourites.
If you would like the chance to win then hop on over here and upload your aqua project...


I decked out an old lampshade..


To gather the ribbon I machine stitched with a straight stitch zig zag fashion along the length of the ribbon.. when the thread is drawn up it forms a loopy trim.


I added a bow of chevron ribbon with a bit of bling too.


If you're going to use the lamp then you can spray everything with a fire retardant spray.

Sunday, 16 March 2014

Boing!

... Spring lambs everywhere...
The colour challenge over on The Ribbon Girl challenge blog this month is Green....


And up for grabs is a £10 voucher to spend on lovliness from The Ribbon Girl shop and a £10 voucher from LOTV... so hop on over to share your project.


If you like the little lamb you can find him here...


The basket is made from the top of a papier mache egg.
It's painted with acrylic paint and coated with Glamour Dust.


The bottom of the egg was used for a different project.... coming soon!


The eggs are Cadburys..... and were lovely!

Sunday, 16 February 2014

In The Red!

... It's that time again... The Ribbon Girl colour challenge and being February the colour is red.
I started with a plain canvas... added a piece of patterned paper, knocked the colour back with gesso.. stuck down a piece of lace, made a frame with a Sizzix die and layered up ribbon, lace and buttons.


I framed the whole thing with strips of torn book pages.


Love the little birdie.


All the lovely trimmings can be found in the Ribbon Girl Shop.
and if you would like the chance to win some then upload your project here

Sunday, 26 January 2014

Save Those.....

.. Scraps.... Over on The Ribbon Girl Challenge Blog there will be a whole new year of challenges, this months Colour Challenge is Anything Goes..so I've used some of the small scraps and bits and pieces I have left over from previous challenges to create a scrapbook page.... (yes I still scrapbook, and yes I'm still working my way through my 2012 Florida holiday!)


Love the dotty sheer ribbon...


and the ready made roses... told you I was lazy!


and who can resist a twinkly star!

                                             
So If you would like to win some Ribbony goodness then head on over to The Ribbon Girl Challenge Blog 

Sunday, 17 November 2013

Winter.....

White..that's this month's colour challenge over on the Ribbon Girl blog. Keep it simple and add interest with texture.Liquid pearls enhances the embossed snowflakes. The star is made with the Sizzix five point 3D star die, the finished star measures around 23 cm.                    

I used a Die-Namics photo frame die for this card and cut out the word with By the Letters alphabet dies.


Hop on over to The Ribbon Girl Blog and add your white creation for the chance to win some fabulous goodies!


Sunday, 30 June 2013

Hello!

I'm easing my way back into crafting mode....slowly but surely. Health issues still not resolved but trying not to panic and carry on regardless! I spent a lovely afternoon with 3djean and the Ribbon Girl making cards...We got to look in The Ribbon Girl shop!.what lovely stuff!..

 
.I'm in slap it on mode... the more bits the better, the images are from the Grandmas Attic collection from Pion....you can find them here...

 
I love the soft romantic touch of colour.

 
The butterflies are cut from a sheet of 12x12 paper from Kaiser Craft.
The birds are chipboard  from Collection Elements.. I glittered them with  vintage glass glitter

 
All the ribbon,trim and beaded embellishments are from The Ribbon Girl 
 

Sunday, 17 February 2013

Tweet!

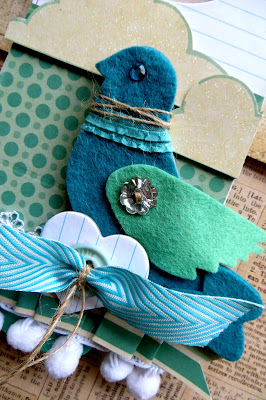
The Ribbon Girl colour challenge this month is Aqua...I love that colour, it goes with almost everything... especially red. I resisted the temptation this time,kept to the one colour and created this bird house door hanger...

If you would like to play along with the challenge then hop on over here...
You can find ribbons, buttons, lace, felt and other yummy stuff here.

Sunday, 20 January 2013

All made With Ribbon...

It's time for January Ribbon Girl colour challenge, this months colours are ivory and pink. These flowers are easy to make and depending on the ribbon you use can look so very different. The middles are just layered up buttons and pearl beads.


To make the flowers  take a length of ribbon ...around 35cm is a good length to start with.. the longer the ribbon the more petals you will have. Stitch along the length of the ribbon diagonally, the spaces between the the peaks are roughly 4-5 cm, use a fairly long stitch. 
Carefully pull up one of the threads to gather the ribbon, do this quite tightly and evenly.Use the thread to stitch the bottom of each petal together, this will pull the flower together, securely fasten off the thread, tuck the ends of the ribbon  behind the flower and secure with a few stitches. 
To make the stamens for the ivory flower simply tie knots at intervals in some seam binding, snip next to the knot as closely as possible....stitch to the centre of the flower before adding your buttons.

Sunday, 2 December 2012

I'm Still....

..trying to get back to normal.. time just seems to be running away, so much so I forgot about the December Challenge over on the Ribbon Girl... to be fair it's usually my turn in the middle of the month but this month there will be only one challenge... so hop on over for the chance to win a voucher for £20 to spend on lovliness in the shop.


There's nothing like a bit of bling at Christmas.

 
..and one of my favourite Suzi Blu stamps.

Sunday, 18 November 2012

Let Me Out.....!

It's time for the Ribbon Girl colour challenge.....guess what colours this month...

.yes, lilacs and lavender..the stamp is Danita,s Angel from 100%Proof Press. She's trapped inside a bauble... no mean feat to get her standing up straight, the whole thing nearly went out of the window a few times!
All the trimmings you need, including the Stickles, flowers, charms and her magic wand are available here

Sunday, 16 September 2012

Stitched Up!

Pink and green... that's the colour challenge over on the Ribbon Girl blog. What can you do with a Kilner jar?... make a sewing kit! Add a little stuffing and fabric to make the pin cushion in the lid.

Stamp up some button cards... stamps from Papertrey
Make a match book to hold your pins and needles,wrap up an inexpensive tape measure and use some die cut bobbins for your threads and ribbon. Hop over here to enter the Ribbon Girl challenge and win some yummy stuff.


Sunday, 19 August 2012

Pillow Talk

It's that time again... The Ribbon Girl Colour challenge.. hop on over here for the chance to win a mini ribbon kit and a £10 voucher from LOTV This month I've made pillow boxes and decorated them with all kinds of lovely trims from The Ribbon Girl.


I especially love the new Faux Diamante Trim... this stuff is fab, I've cut it into strips, coloured it with Promarkers and even stuck it down around curves...just snip one of the two threads holding it together after you have cut an individual strip.


The Bias trim is great to edge the flap of the pillow box too.


Here's the template for the box.... the black lines are for the standard box and the red are the cutting lines for the box with a flap.. glue the sides together when making the flapped box.The papers are from 3djean


... Doh .. the bottoms a bit skewwiff but I'm sure you'll manage!

Sunday, 15 July 2012

It's A Small World

It's time for the July Ribbon Girl colour challenge, this month is Blue, Aqua and Teracotta...not much of the latter but lots of blue, a colour I don't often use. Here's the basic ingredients...


and here's a little something on wheels!...


with wings....... and a crown.....what more could a girl ask for!


a little canvas for good measure...


Talking of measures.. there's no tape measure ribbon on it, that's something I'll have to sort out!