Showing posts with label Patchwork. Show all posts

Wednesday, 21 December 2011

Mini....

Quilts....are fab to make, really quick and relatively easy.....though the mini heart fabric piecing didnt go quite to plan, I unpicked it more times than enough.The whole thing nearly went out the window! the problem has always been how to hang them. So with a bit of chipboard and some curtain clips I made the one above. The one below is just a piece of florists wire threaded through some pegs and some chipboard hearts stuck on.This quilt measures approx 8x10 inches.

and a combination of the two.. chipboard and pegs, I'm sure this idea can be developed even further.If you make one leave me a link so I can come see.


This one is around 12 inches square.

Sunday, 18 December 2011

Red, Black And Cream

That's this months colour challenge over on The Ribbon Girl blog. You can win a fab selection of ribbons, a £10 voucher from Lili of the Valley and this mug rug by yours truly.


So pop over and add your link to your project...

Sunday, 30 October 2011

So far.....

...Out of my comfort zone.......I thought I should blog some stuff that didn't really work for me...The lovely ladies from Quiltesk came to give us another class yesterday and this is what we made........or should have made. I changed the shape ( there go the instructions again) I loved these fabrics but........


the whole thing just hasn't come together.. I've still to finish it but the enthusiasm just isn't there. I will post the finished article.....I just think it's good to aknowledge that things don't always turn out the way you want them to!


Thursday, 20 October 2011

Is It Just Me......

...That can't follow instructions?...I set out with good intentions, really meaning to do as I'm told.
This is the pattern (sorry it's a link and not a picture). I thought I'm going to make this....

but I didn't like the colours.... so I chose my own...

I didn't like the 'fat' Santa so he went!

I'd lost the will to live by the time I'd pieced three Santas..........

So I made it smaller........................so much for following instructions!

Monday, 10 October 2011

Done!

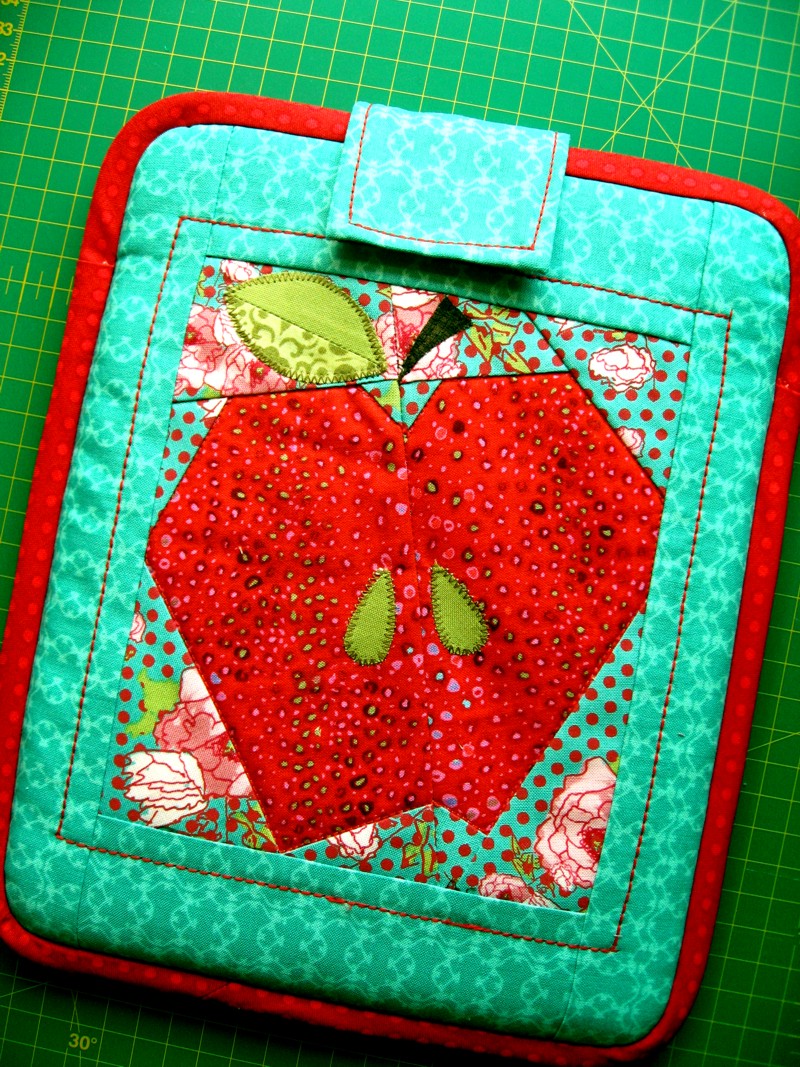
One finished iPad cover....


To make, cut four pieces approx 26x22 cms, one front, one back and two lining pieces (you may want to quilt or applique the front before you cut to size as I did) Cut two pieces of wadding (batting)Round all the corners. Layer your pieces, front,wadding, lining. make or buy some bias binding and bind the top edge. do the same with the back, back,wadding and lining. Before you bind the top of the back make a tab, stitch on a piece of velcro and stitch in place when stitching on the binding.


If you cant get the same colour Velcro use white and use a Promarker to colour, Stitch the opposing piece of Velcro to the front.


Place your front and back together and using another piece of bias binding stich them together starting where your binding finishes at the top edges.All the bindings are hand stitched on the reverse.


Done! Tip!...I would make the binding that goes around the sides and bottom a little wider next time. But I'm quite pleased for a first attempt.

Sunday, 9 October 2011

Nearly There

It only need quilting now.....


and the iPad cover is almost finished too.

Friday, 7 October 2011

Work ....

..in progress, the fab ladies from Quiltesk came to give a workshop. Piecing apples, batik is not my favourite fabric ( a hang up from tie dye days!) but i think it might turn out OK. It's a panel of nine blocks with sashing and a border.............but........

I need to make an iPad cover so watch this space.....no laughing those who know I have trouble with a mobile phone!


Saturday, 10 September 2011

Another One Finished!

I liked this jelly roll when I bought it................I didn't like it when I was stitching it ( it's so not my colours!) but I like it again now it's quilted....

I'm getting adventurous.I quilted it in a petal pattern.


I love the way it all wrinkles when it's washed!

Saturday, 3 September 2011

Stash.......

It's the quilt show at Harrogate this weekend........I went yesterday, just bought a little something.

I love this.it's just a sample pack...I've seen it somewhere but can't remember who it's by.


Bargain of the day......these lovely vintage lace collars..............50p each, don't you just love it when you find some thing special.


But not as special as these............fabulous gold angel wings, there's 58 in the bag and yes 50p for the lot!.........look out for more paperclay birds with angel wings!


Monday, 29 August 2011

Face Number 2

There's been progress........face number 2 is done. I'm still in the middle of collecting the right material for the fabric version..what an excuse to go stash shopping!


If anyone knows of any suitable fabric ranges then please let me know.


..another 2 faces to follow...........

Friday, 24 June 2011

Well I Never..

...Thought I'd find anything remotely useful to to with old CDs....but a swap on UKStampers got me thinking and this is what I came up with...


Cut 2 pieces of fabric slighly larger than the CD. Cut 2 pieces of batting using the CD as a template.Make a length of bias binding long enough to go around the CD.


Use spray adhesive (Gunold KK100... fabulous stuff!) to stick one piece of batting to one piece of fabric and quilt on the machine.


Sick this to the CD...stick the other piece of batting to the other side of the CD and then stick the other piece of fabric to the batting...one sandwich with the CD in the middle.


Using a zipper foot on the machine stich around the CD.. trim to .5cm


Tack the bias binding in place and using backstitch sew aound the CD.....I know hand stitching is a pain but the zipper foot doesn't stitch close enough to the CD. Fold the bias in half and hand stitch on the reverse
.....one 'altered' CD! and one cute coaster.


Thursday, 25 November 2010

Last Ones......

I promise!.......though I think I could get carried away with these, they're so quick to make and lend themselves to many variations.


The large on is made from a white wool fabric...I like the chintzy one with the yellow felt leaves.. a little bit retro


This one is made from an old table cloth with a few bits of vintage haberdashery ( at last a use for all that old stuff I've been hoarding!)


No more pears for a while!
If you would like to own anyone of these, tell me which one you would like (Not the previous silver vintage one, that's MINE!) and leave a comment and I'll do a random pick on Saturday,27th.

Thursday, 22 July 2010

Remember This...

Disaster...........well it's finished, it didn't turn out too bad. It's a little different to the pattern, I added a border of spotty purple to make it bigger.


One day I'm going to make something and follow the instructions to the letter....
One day!

Tuesday, 15 June 2010

Disaster!

I wanted to make this...............
From this book.......so I read the first paragraph, and thought I'd be a smarty pants and cut and sort all my pieces.........only to find I hadn't read ALL THE INTRUCTIONS!
I've cut half of them the wrong way round!........ that'll teach me!... so instead it's going to look like this!

The quilt underneath is one my Husbands Great Aunt made, it's about 50years old........all hand sewn!
I haven't got the patience for that........... and it seems I haven't got the skill either!


So in future I WILL read instructions properly!
Well....... maybe not!